Hue, Value, Tint, Shade, Chroma

The rules for combining pigment colors are different from those for combining light colors.
White light can be produced by combining all colors of the spectrum at once, as Newton discovered. However, it is also possible to make white light by combining only three colors in the spectrum: red, green, and blue. For this reason, these three colors of light are known as the primary colors when we speak about light or printing.
A pigment is a substance that reflects only certain wavelengths of light.
In "painter color"mixing, combining all three of the primary colors of paints, yellow, blue, and red, produces black paint.

Color Properties.
 
Hue:
The actual color of something, such as red, green, or blue, or the name we give a color.
Each primary, secondary and tertiary hue is at a level of full saturation, or brightness. Which means there is no black, white, or gray added.

Value:
Value or tone in painting context is a measure of how light or dark a color is,without any consideration for its hue (color). By adding a relative amount of white or black in a hue can be achieved a variety of tones.
Value or tone is that how light or dark it seems is also influenced by what’s going on around it. What appears light in one circumstance, can appear darker in another circumstance, for instance when it’s surrounded by even lighter tones.

Shade:
The hue (color) produced by mixing a color with black or gray results in darker values of the hue known as shades. For example, burgundy is a shade of red.

Tint:
A tint is any hue (color) that has been mixed with white resulting lighter values of the hue. Pink is a tint of red.


Tint and shade of color red

Chroma:
The chroma or saturation of a color is a measure of how intense it is. Think of it as “pure, bright color”, compared to a color diluted with white, darkened by black or gray, or thinned by being a glaze. Variations in chroma can be achieved by adding different amounts of a neutral gray of the same value as the color we're wanting to alter.
It is difficult to distinguish between Shades (in terms of hue). Tints are easy to distinguish between.
The difference between chroma and value is that with chroma you’re considering how pure or intense the hue is, whereas with value you’re not considering what the hue is at all, just how light or dark it is.


Privious: Lesson 3 -The color wheel
Read more >>

Along the River - acrylic painting

Another summer landscape a 30 cm x 30 cm acrylic painting on canvas.
Summer landscape on a river side-acrylic painting


Although winter has come and Santa brought us the first snow flakes, I just finished painting this summer landscape.


I wish you all, joy and happiness for the holidays!

Have a great time, where ever you are!
Read more >>

Silent night - winter landscape original oil painting

Cozy winter cottage painting near the forest, snowy winter scene.
This painting was inspired of the beautiful winter holidays atmosphere, the peace and serenity of a beautiful, quiet winter night in the moonlight.
winter scene with a cozy cottage near the forest
30 cm x 25 cm - oil on canvas

This little cottage near the forest is on my wish list for Santa Claus.
May everyone spend Christmas evening in such a peaceful place.
Read more >>

Sunrise-acrylic landscape painting

The inspiration for this landscape painting was one of the river scenes from my home town.
The river called Somesul Mic crosses the town and offers a wonderful landscape to the viewer.
Sunrise on the river - acrylic painting

25 cm x 30 cm - Acrylic on canvas

Read more >>

Winter's Sparkles - pastel painting

This is a 42cm x 33 cm pastel study on black paper made for a future acrylic painting.

Constantly reading and tying to improve my painting skills, I found a very useful tutorial of the great painter, Lorraine Vatcher at Creative Spotlite.
The artist describes with many details the technique, the paint mixing and brushes she used in the painting process of this beautiful artwork.
I asked Lorraine's permission to publish her step by step tutorial on my site, for the benefit of more beginner artists.
Please feel free to read and enjoy the tutorial!
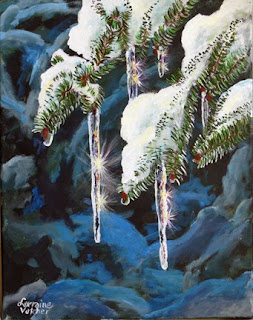
branches of a spruce tree with snow and sparkling icicles on them42cm x 33 cm pastel study on black paper
Read more >>

The Color Wheel

The color wheel becomes a visual aid in helping us understand the principles of color.
It is also an excellent tool to help create harmonious color schemes for painting, interior decorating , and commercial design. It creates an orderly progression of color that helps us understand color balance and harmony.

Primary Colors.

In the middle of the color wheel we place an equilateral triangle containing the 3 primary colors:
yellow, blue and red.
Primary colors on the color wheel

These are the three basic colors that are used to mix all hues.

Secondary or Complementary Colors

When any one primary color is mixed with another a secondary color effect is produced.
By taking two primaries and mixing them together will result the opposite of the third primary color or it's 'complementary' color.
3 secondary colors are produced from the mixing of one primary color with another and they are:
• orange (mix red + yellow)
green (mix yellow + blue)
violet (mix blue + red)

Secondary colors on the color wheel
The next step to create the 12 step color wheel is to draw a ring around the newly formed primary and secondary color form. Divided into 12 equal segments, the primary and secondary colors will be repeated to their corresponding segments within the surrounding ring. This will leave a blank segment between every two colors. In these blank segments the tertiary colors will be created.

Tertiary Colors

These colors are created when mixing one secondary and one primary color. i.e. blue + violet = blueviolet. Three or more separate colors are mixed (one primary and one secondary – the combination of two primaries), and in our color wheel each tertiary color being created will be an equal combination of the two colors, left and right, surrounding an open segment.
The tertiary colors are: yellow-orange, red-orange, red-violet, blue violet, blue-green, and yellow-green.
The painter's color wheel
We can now use our color wheel as the basis to understanding color and color combination techniques.
Read more >>

How do we see color?

Color effect.
By passing sunlight (white light) through a prism, white light refracts (is bent, causing light waves of different lengths to be revealed, red having the longest wave length and violet having the shortest) into the visible spectrum. This is the colored light in the visible spectrum ranges from red to violet.
The same spectrum is to be seen at the rainbow colors arranged in their natural order: Red - Orange - Yellow - Green - Blue - Purple - Indigo.

Daylight (white light) is made up of numerous waves or impulses each having different dimensions or wavelengths. When separated, any single wavelength will produce a specific color impression to the human eye. What we actually see as color is known as its color effect. When an object is hit with light rays, the object absorbs certain waves and reflects others.
For example, what we actually see when we observe a red flower is that the flower appears red because it reflects only red light and absorbs all other light.
The flower does not have color in itself. The light generates the color. What we see as color is the reflection of specific wavelength of light rays off an object.
The color white: If all light waves are reflected from a surface the surface will appear to be white.
The color black: Similarly, when all light waves are absorbed by a surface the surface will appear to be black.
The energy of light waves is converted into heat when absorbed. You can feel it without looking if you touch a dark colored car and a white or light colored one on a hot summer day.

the spectrum
The visible color spectrum.

Color Theory:
Read more >>

Acrylic Painting Demonstration

This is a very instructive and detailed tutorial of one of the great painter, Lorraine Vatcher's exceptional artworks.
The artist describes in many details the paint, the brushes and the technique as well, she used in the painting process.
I consider, this tutorial is a great help for many beginner painters (like myself) and asked the artist's permission to publish it on my site. I hope you will enjoy it the way I did.
Have a great time reading and painting!
Nature's Decorations-acrylic painting

Nature’s Decorations -16x20 Acrylic on canvas

The picture I am using for a reference was one I took on a beautiful sunny day after a white blanket had covered our world and made it into a Winter Wonderland. Even though it was still cold, the sun had enough strength to start melting the snow on the branches of the spruce trees. As the water fell off the twigs, it froze into solid icicles which glinted in the sun; then the sun split the light into colors of the rainbow when you looked directly into the sun through the icicles.
I truly hope you enjoy this lesson. It really is more of a still life than scenery. I wanted to do something which isn’t a normal lesson. You can change placement of anything if you wish to make it more your own.
For those who attempt it, I would enjoy seeing the finished product so if you don’t mind, I would really appreciate an image of your finished product.
Blocking in the background shapes
First, we will block in shapes of the background which will resemble branches of a spruce tree with snow on them. Mix Windsor Blue with Titanium White in varying dark tones. Do not make them bright because we want the icicle to shine, not the background.With a 1” blending brush, block in these colors in general shapes, fairly linear to resemble the look of snow gathered on branches.
Then do the same with Payne’s Grey mixed with Titanium White in varying tones. The medium tones should be minimal. A light coat of Chrome Oxide Green in a few places gives the illusion of the under branches barely showing. Keep it muted with no real shapes and no light colors; nothing in this entire layer should pop out at you. Remember that the icicles are the focal point. They have to be much brighter than the background.
Blocking in the foreground branches
Block in the shapes of the snow on the foreground branches with Titanium White. Keep composition in mind. Too much white will detract; we want this snow and the icicle to sparkle over the top of the background. Think about where the icicles will hang and how long. Paint them in. Keep the amount of icicles in odd numbers. Block them in.
Painting snow
Use Windsor Blue mixed with white to give shadows in the snow on the branches. In the darkest areas, add just a hint of Payne’s Grey mixed in with the blue. Tops of the snow are always pure white with the bright sun shining on them.
stroking in the buds and the needles of the branchesChange to a liner brush to stoke in the buds at the end of the twigs with Burnt Sienna mixed with Cadmium red. Also, with the liner brush, stroke in the needles from the branches which hang down into the dark background area with titanium white. This will give you a place to paint your green needles. It would be of no use to just stroke them in greens because the color would be drowned out by the dark background.
Many colors are transparent or semi-transparent so the surface has to be prepared to accept another color, otherwise it will have no impact.
Stroking in the needles which are on the areas of white snowUse three shades of green (Sap Green, Hooker’s Green and Chrome Oxide Green) and a liner brush to put in the needles of the branches. For the darkest green, mix Hooker’s Green with Cadmium Red in small amounts. This will make a much darker green. Stroke the needles in different colors. Keeping them the one color would be boring, also sometimes vary the direction because Nature does not always make them go in the same direction. Don’t forget to stroke over most but not all of the white needles hanging off the twigs into the dark background. There will be white highlight in some of the needles because that is where the sun will be hitting and reflecting. Stroke in the needles which are on the areas of white snow. You have already prepared for these because the background of white will readily accept the green colors and show very well.
Painting lightsWith a small round brush, very lightly place a small amount of Cadmium yellow mixed with Titanium White in places on the snow to give a sparkle to the snow as if the sun is bouncing off the surface. In the areas close to the needles, add a small amount of Chrome Oxide Green mixed with white. The green simulates the green from the twigs under the snow as showing through. Although the snow is newly fallen, the hot sun is melting it and turning it to icy pellets in areas close to the twigs. This ice will reflect what is underneath it, namely the green of the twigs.
Ensure that your icicles are pure white before you start to color them in. Then with a small round brush, brush Payne’s Grey in areas down the length of the icicle. Do the same thing again with a mixture of Payne’s Grey mixed with Titanium White. And repeat it in small spots with Windsor Blue with Titanium White. The outside edges down the length should be bright white.
coloring the icicles Next, very sparingly, spot Cadmium Yellow, Cadmium Red and Diazinon Purple. These colors will give the same idea as when a light hits a piece of glass or crystal; the light splits into differing colors. A very little bit of paint will convey the idea.

The sparkles are created in two stages. The first is with a wash of Titanium White. The washes should be with very little color and a number 4 round brush. A number of washes is much better than one solid. Start in the center of the sparkle and pull the brush out to a point. Next, use Cadmium Red, Cadmium Yellow and Diazinon Purple in the same way, although sparingly. After the washes, hit very lightly with a hint of pure color.The small red buds which are hanging at the end of the twigs now get a bit of water hanging from them. Use a liner brush with a little Titanium white to outline the drop. Then fill it in with Payne’s Grey and just touch them with a color in the background which is around them. Water reflects its surroundings.With a liner brush dot the snow in lines where the needles will be peeking out of the snow. In real life, as the snow melts, more will be visible.
creating the sparkles outlining the water drops

This tutorial is copyright Lorraine Vatcher.

Credits:
Originally it was published on Creative Spotlite, where there are many other tutorials to enjoy.
Read more >>

Crystal reflections-acrylic painting

I painted this painting in acrylic, building each layer gradually.
I worked on several areas at a time while leaving the paint to dry before applying a new glaze.
I used a gloss varnish to add shine and to protect the painting from harmful UV rays and dust.
tulip and crystal vase reflecting on the table 12 x 10 inches - acrylic painting

The great artist Lorraine Vatcher shares a step by step tutorial, where she explains how to use and control acrylic paint to have the same intensity of color as that of oil paints.
Read more >>

Flowers in a Jar - Pastel painting

Pastels are a fast way to sketch and plan future oil and acrylic paintings.
Here is a small pastel study on paper, exercise for flower and glass painting.
flowers in a jar-enlarged pastel painting

30 cm x 20 cm - Pastel on Paper


You can see some more pastels at my webpage.
Read more >>

Rocks on the Beach - acrylic painting

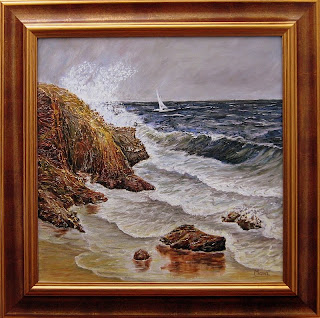
This seascape is a 40 cm x 40 cm textured acrylic painting.
I began with an underpainting, not too dark in value.
For the rocks and waves I mixed thick heavy gel matte to pure paint.
Seascape with rocks along the shore

After the underpainting dried, I used a palette knife to spread the heavy gel matte over the rocks’ and waves’ surfaces.
While it was wet, I formed the texture lines with the edge and point of a palette knife. After drying, I applied several layers of thin glaze for the ditches and crevices, highlights and shadows.
Here is a close up of the rocks' texture
I painted this painting after the great artist, Julie Duell’s tutorial, with the artist’s permission. I am very grateful for her help.
I created my own 3D texture of acrylic gel.
Read more >>

At the lake - Original oil painting

This summer landscape is an imaginary lake scene, a peaceful place I'd like to be.
The triptych consists of three paintings, 20cm x 28cm each canvas.
summer scene near a lake-oil paintingTriptych - 60 cm x 28 cm - oil on canvas
Read more >>

Forest scene painting - autumn landscape oil painting

Autumn forest scene painting.
The bright autumn colors, the golden autumn leaves are the inspiring force for this oil painting .
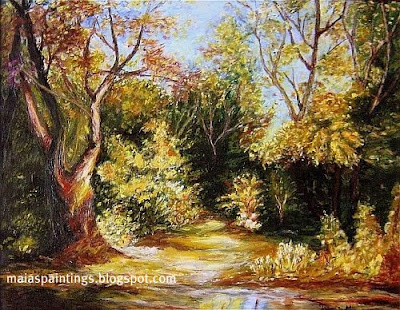
Autumn forest scene - oil paintingForest path - 42.5 cm x 33 cm - Oil on board
Read more >>

Wildflowers - oil painting

Still life painting of a small bouquet of wildflowers in a vase.
still life with meadow flowers in a vase-oil painting
14 cm x 18 cm - Oil on board
Read more >>

Still life with sunflowers-meadow flowers - oil painting

Still life with three sunflowers, daisies, poppies and other wild flowers in a vase.
Such a bouquet on the table can fill the surrounding atmosphere with joy.
still life with colorful flowers in a vase-oil painting

37cm x 27.5 cm - Oil on board
Read more >>

Hollyhock flower - original acrylic painting

Red hollyhock flower against a background of leaves.
The inspiration for this acrylic painting came from one of my photos about the ancient hollyhock, the marvel of the gardens that blooms all summer.
red hollyhock flower-acrylic painting30cm x 30cm - Acrylic painting on canvas
Read more >>

Lilacs and Strawberries - Still life

When I begin to paint I want to see it ready as soon as possible, so I don’t make sketches or planning. I know....you probably consider it as making great mistake.
At the beginning, I didn’t know exactly what I want to paint so I added the elements “on the go”.
I used a painting knife to apply the thick oil paint for the flowers’ texture.

After waiting a few weeks  for the paint to dry, I applied layers of glaze for shadows and lights. Oil painting - still life with lilacs and strawberries on a table
Still life with lilacs and strawberries
17cm x 25 cm - original oil painting
Read more >>

White narcissus daffodil - original oil painting

White daffodil flower, this elegant and graceful spring flower is a perfect subject for a painting.
It is quite a challenge for me to paint the graceful petals and the colorful central trumpet.
Here is my white daffodil close-up painting.
white narcissus flower-oil painting 30 cm x30 cm - Oil painting on canvas.
Read more >>

Index of blog posts


Paintings and drawings (list view):
Tutorials
Random subjects
Blogroll
Read more >>

Search for paintings, photos and tutorials!